Less Spray, More Miles: The Quiet Case for Proper Mudguards
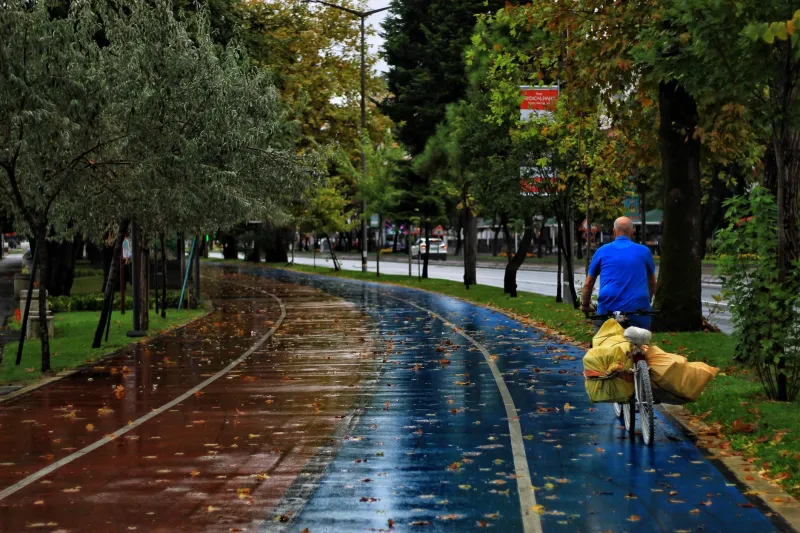
There is a particular kind of British winter ride where you finish feeling like you’ve been gently hosed down by a passing tractor. Your shoes are full, your lower back has its own weather system, and the person behind you has been drinking your wheel spray for the last ten miles. Mudguards are the unglamorous answer. They are also, pound for pound, one of the best comfort upgrades you can make to a bike that gets used between October and March.
This isn’t about turning your weekend bike into a catalogue piece. It’s about less spray, fewer soaked layers, and more of the rides you actually meant to do. Fitting a set of guards is not a personality change. It’s just good manners to your legs, your drivetrain and the rider sitting half a wheel back.
The real cost of spray
When the roads are wet, the front wheel throws water up into your feet and shins. The rear wheel sends a steady stream up your back, into your seatpack, and across anyone tucked in behind. That water isn’t clean. It carries grit, road salt and the sort of fine slurry that finds its way into bearings and chain links.
A decent front guard cuts the worst of the foot-spray. A rear guard with a flap keeps your back drier and protects the rider behind you. Neither will keep you totally clean — this is Britain, not a car advert — but the difference between a ride with guards and a ride without is the difference between a damp jacket and a soaked-through base layer.
There’s a mechanical argument too. Less spray means less grit around the bottom bracket, less crud on the chain, and fewer post-ride cleaning sessions. If you ride through winter on wet lanes, guards do more for component life than an expensive ceramic coating ever will.
Clip-on versus full guards
Clip-on guards are the easy entry point. They strap or clamp onto the frame, come off in seconds, and suit bikes without mounting points. A basic rear clip-on and a small front guard can be picked up for around £20–£30, and they’re far better than nothing. The catch is coverage. Most clip-ons are short, they can rattle on rough surfaces, and the straps can mark paint if you leave them on through a gritty winter.
Full guards — the traditional kind with stays and a fixed mounting kit — offer much better coverage and a quieter ride. They keep spray off your feet, your back and your drivetrain, and they tend to stay put. The trade-off is fitting. You need frame eyelets, enough clearance around the tyre, and a bit of patience with stays and bolts. Some bikes make this simple; others require adaptors, zip ties or a creative approach around disc brakes.
For a bike that lives outdoors and does regular winter miles, full guards are usually worth the faff. For a fair-weather bike that occasionally sees a damp morning, clip-ons are a sensible compromise.
Will they fit your weekend bike?
The first thing to check is clearance. Full guards need a few millimetres of space around the tyre, plus room for the stays and the mounting hardware. A road bike running 28mm tyres may just about take a narrow guard; a gravel bike on 40mm rubber will need something wider and more generous. Hybrids and commuter bikes often have the easiest time of it, especially if they already have eyelets and a sensible gap between tyre and frame.
Disc brakes are not a deal-breaker, but they do change the shape of the problem. The caliper can get in the way of stays, so look for guards designed with disc-equipped bikes in mind. Thru-axles are usually fine; quick-release mounts can sometimes need a different bracket. If your bike has no eyelets at all, there are adaptor kits and clamp-on options, but read the reviews before buying — a loose guard is worse than no guard.
Width matters as much as length. A guard that is narrower than the tyre will still let spray past the edges. Match the guard to the tyre, not to the bike’s official category. A 35mm guard on a 38mm tyre is asking for trouble.
The budget route
You do not need carbon fibre, bespoke paint or a designer logo. A basic set of plastic full guards with stainless steel stays will do the job for many riders, and replacement stays and bolts are cheap. Look for a rear guard with a decent flap — the bit that extends down towards the bottom bracket — because that is what keeps the worst of the road filth off your frame and your riding companions.
Budget clip-ons are fine as a starter, but check the fixings. Cheap rubber straps can stretch and slip; a simple bolt-on bracket is often more secure. If you commute or ride regularly through winter, spending a little more on a guard that fits properly is better than buying three that don’t.
And please, set them up properly. A guard that rubs the tyre, rattles over every catseye or sits crooked is a misery. Take ten minutes to adjust the stays, trim the flap if needed, and check the bolts after the first wet ride.
Group-ride etiquette
Here’s the bit that doesn’t get said often enough: mudguards are a courtesy. If you’re riding in a group through winter, a proper rear guard with a flap is the difference between your mates getting a bit damp and your mates getting a face full of grit. A short clip-on that ends before the wheel does very little for the person behind you.
That doesn’t mean unguarded riders are villains. Plenty of people ride bikes that can’t take guards, or join a club run on a dry forecast that turns sour. But if you’re the one with guards, use them properly. If you’re the one without, don’t sit inches off someone’s wheel and then complain about the spray. A little space is the polite solution.
The quiet upgrade
Mudguards won’t make you faster. They won’t make your bike look like a magazine cover. What they will do is keep you drier, keep your bike cleaner and make a wet weekend ride feel like a normal ride rather than a small act of endurance. In a UK winter, that is not a small thing.
Fit a set. Ride through the puddles. Arrive home with dry-ish feet and a chain that still looks like a chain. The humblest upgrade on the bike is often the one that gets you out the door again next weekend.