A Single Spoke Between You and the Train Home
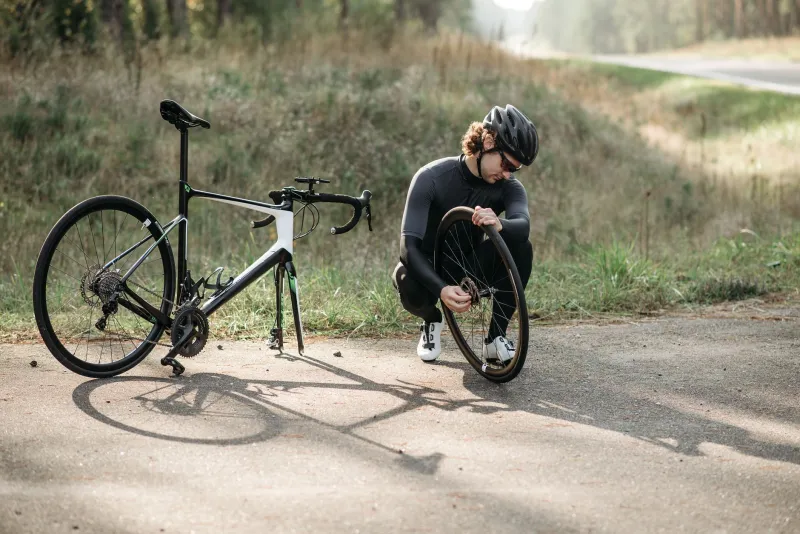
There is a particular sound that ends a good Sunday ride. It isn't the hiss of a puncture, which at least announces itself politely. It's a sharp ping, followed by a clunk, followed by the sudden sensation that your back wheel has developed a limp. You look down. One spoke is dangling loose, the wheel is wobbling, and the nearest station is eight miles in the wrong direction.
Most of us carry a tube, a couple of tyre levers and a multi-tool. Very few of us carry a spare spoke. That is a small oversight with an outsized consequence, because a single missing spoke can turn a lovely loop into a slow, brake-rubbing crawl home — or a call to whoever owns the car.
The case for carrying one is not about being a hero mechanic. It's about buying yourself options. A spoke and a spoke key weigh almost nothing, cost less than a round of post-ride coffees, and turn a ride-ending failure into a ten-minute roadside fettle. The trick is knowing which spoke to carry, and what to actually do with it when the worst happens.
Why one broken spoke matters more than it should
A wheel is a system under tension. Spokes don't hold you up by pushing; they hold each other in balance. Remove one and the neighbouring spokes suddenly have less company, so the rim gets pulled towards the side where the spoke used to be. The result is a wheel that is out of true — it wobbles, it rubs the brake pads, and on a tightly clearanced frame it can start kissing the chainstays.
On a 32-spoke wheel, one broken spoke is usually survivable. You'll feel it, and you'll hear it, but you can often limp home. On a low-spoke-count wheel, or if two go, the wobble can be severe enough that the tyre rubs the frame. That's when people start phoning for lifts.
The other issue is where the spoke breaks. The most common failure is at the elbow, on the hub side. The nipple usually stays in the rim, which is good news — it means you can often thread a replacement spoke straight into the existing nipple without removing the tyre. If the spoke has snapped at the nipple end, or the nipple has vanished into the rim, the job gets more involved.
The kit that earns its place in the saddlebag
You need three things: a spare spoke of the correct length, a spoke key that actually fits your nipples, and a way to check truth without a truing stand. That's it. You do not need a full wheel-building kit, and you certainly don't need to carry a spare wheel.
Measure an existing spoke first. Spoke length depends on hub and rim combination, so the safest approach is to take one out and measure it, or ask your local shop to match it. Carry the correct type too: most wheels use J-bend spokes, but some use straight-pull. The wrong one is dead weight.
Spoke keys come in a few sizes, usually 3.2mm, 3.3mm and 3.5mm. Buy the one that fits your nipples snugly. A sloppy fit rounds the nipple, which is a special kind of roadside misery. A small zip tie is also worth having — more on that in a moment.
Some riders carry an emergency fibre spoke, which hooks around the hub and rim without needing a nipple. They're clever things and worth considering as a backup, but they're a get-you-home device rather than a proper repair. A real spoke and a key are the better long-term investment.
Roadside triage: look before you fettle
When the ping happens, don't panic and don't immediately start turning nipples. Stop somewhere safe, away from traffic, and have a proper look.
First, find the break. Is the spoke dangling from the hub, or has it pulled through the rim? Is the nipple still in place? If the nipple is still sitting in the rim bed and the spoke has broken at the elbow, you're in the easy scenario. If the nipple has disappeared, you'll need to remove the tyre and rim tape to fit a new one — a bigger job, but still doable if you're patient and the weather isn't horizontal.
Second, check the rim for damage. A broken spoke can occasionally take a chunk of rim with it, or the wheel may have gone out of true enough that the tyre is rubbing. Spin the wheel and watch the gap between rim and brake pads, or between tyre and frame. If it's rubbing badly, deflate the tyre slightly to get clearance for the ride home.
Third, remove the broken spoke. Don't leave it dangling where it can whip into the frame or wrap around the cassette. If it's broken at the elbow, you can usually pull it out from the hub side. If it's still attached at the nipple, unscrew it or bend it out of the way.
The field fix, step by step
Assuming the nipple is still in the rim and you have the correct spoke, here's the sequence. Shift the chain onto the smallest cog to move the rear mech out of the way. Remove the wheel and, if you need to, let a little air out of the tyre.
Thread the new spoke through the hub flange, following the same lacing pattern as its neighbours. This is the fiddly bit: look at the spoke on either side and copy the angle. Feed the threaded end towards the rim, then locate the nipple in the rim bed. A small screwdriver or the tip of a tyre lever can help guide it. Once engaged, turn the nipple by hand as far as it will go, then use the spoke key for the rest.
Don't crank it up to full tension at the roadside. You're aiming for 'roughly right', not 'perfect'. Tighten the new spoke until it feels similar to its neighbours, then check the wheel for wobble. If the rim is rubbing, tighten the spokes on the opposite side a quarter-turn at a time until it clears. If the wobble is severe, loosen the spokes on the same side as the break very slightly to let the rim settle back towards centre.
A zip tie around the chainstay or seatstay, trimmed so it just kisses the rim, makes a decent truing gauge. Spin the wheel and watch where the rim touches. Adjust in small increments. Quarter turns are plenty. This is not the time for heroics.
What to check before next Sunday
Once you're home, the real work starts. A wheel that has lost a spoke has been stressed, and the remaining spokes may need retensioning. If you're not confident doing that yourself, a local shop will usually true a wheel for a sensible price — and it's money well spent compared with a rim failure on the next descent.
Before your next ride, give your wheels a quick once-over. Ping the spokes with a fingernail: they should sound broadly similar, not dull or rattly. Check for seized nipples, especially on winter bikes, where road salt and aluminium nipples are a miserable combination. Brass nipples are less fashionable and more forgiving. Look for corrosion around the eyelets and any spokes that are visibly slack.
If you ride through a British winter, this matters more than you'd think. Potholes, salt, grit and the occasional flooded lane all take their toll. A spoke that has been quietly fatiguing for months will often choose the coldest, wettest Sunday to make its exit.
The ten-minute skill worth having
The spare spoke is not glamorous kit. It won't improve your Strava times or make your bike look faster. But it sits in the saddlebag as a small insurance policy against the sort of day that ends with a soggy wait on a platform at Didcot Parkway.
Learn the fix once, in the warm, on a wheel you don't urgently need. Practise threading a spoke and turning a nipple. Then put the spare spoke, the key and a zip tie in your bag and forget about them. With any luck, you'll never need them. But if you do, you'll be very glad you bothered.